Pinky swear, this is the second to last post about my wedding (so that I can bore you to death with our honeymoon in Japan :P) and it felt right to stop teasing you with the tutorial on the thing-a-majig on my head.
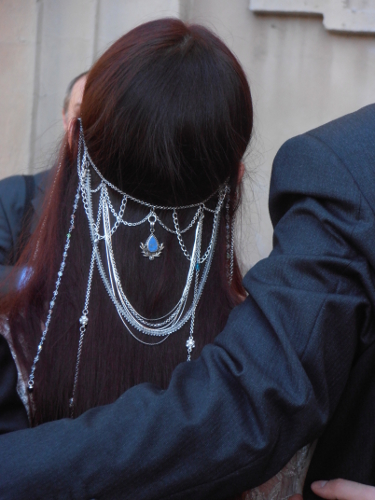
It is not hard to make, it’s just not so very handy.
What you’ll need:
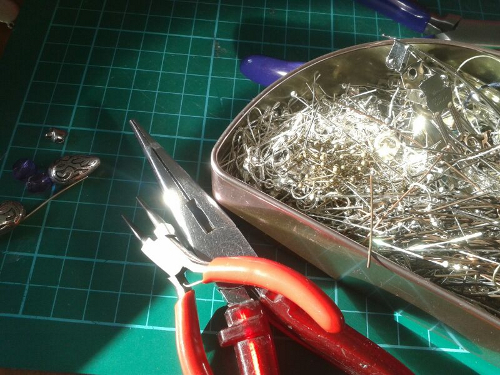
pen and paper
jewellery chain (I used silver, but it’s up to your tastes, just like anything that follows, so I’m not going to repeat this, less I get too boring :P)
beads, hooks, connectors, charms, bells, needles, anything you might want to add
round nose pliers
flat nose pliers
cutter
taylor’s measuring tape
a big jar, more or less like your head
painter’s tape
two mirrors (to see yourself front and back) and/or a camera to snap pictures of all sides
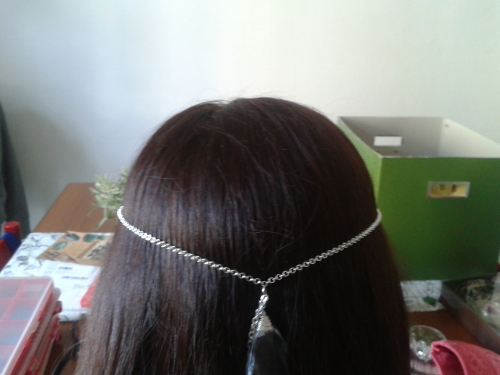
There, if you can center your pictures it’s even better, this was my very best :P
Start off jotting down an idea of what you want (a very simple, ugly or perfect sketch, it doesn’t matter, it’s only to have a layout of the finished work) and keep that close while you work, as a reference.
1 – Measure your head circumference, exactly where you want the headpiece to sit. Then subtract a couple of CM (or half an inch?)
I removed just one cm and I was wrong, I don’t know if I have to blame the weight, the straight hair, the moving, but it kept sliding down onto my ears (as pictured above :P), if it was a little bit more snug the weight wouldn’t have mattered so much.
But when I was making it and trying it on, it sit perfectly so I didn’t consider time and weight. Now let me pass you this bit of knowledge 😛
2 – Cut a piece of chain with the measurement you took (yes, you might keep the measurement a little bit “abundant” at first and cut the excess off later, but keep simmetry in mind) and close it up to make a circle. My closure was sitting on my forehead where I put a little drop charm.
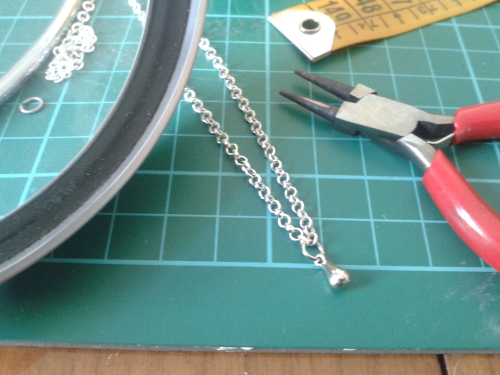
3 – Put the headpiece on your head and start deciding where to put chains, dangling things and charms. Mark where you want with a ring or a needle, take the same measurement on the other side.
4 – Wear the thing again with the rings in, and decide how long all the dangling things will have to be.
5 – Stick your headpiece-to-be with painter’s tape to the big jar, so it stands there, doesn’t tangle up and you can work on it with both hands while keeping an eye on the outcome.
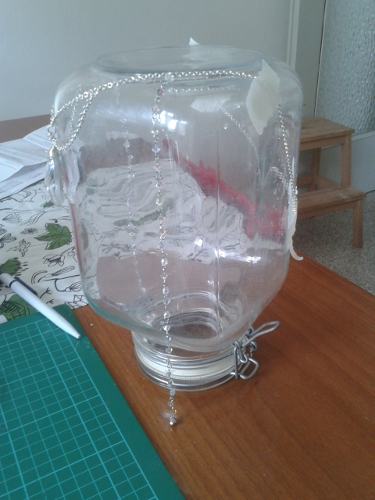
6 – Spend some time threading beads, cutting chains and hanging charms.
7 – Wear the thing again, check, piece by piece, the positioning, length and arranging of everything.
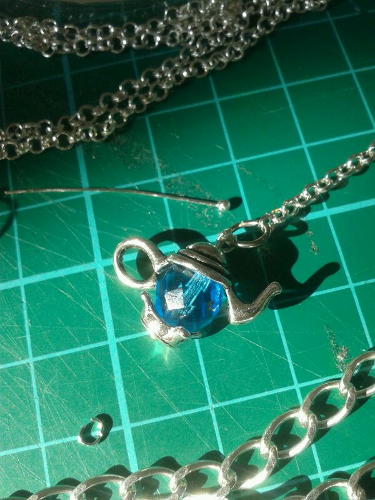
8 – Be very patient, take your flat nose pliers and make your mind clear, now add up all the pieces.
9 – Swear, curs, drop everything, spend 15 minutes untangling chains and beads, have a (chamomile) tea, remove the cat from the pile of supplies, sit back to work.
10 – Once you’re done attaching, draping (yes, draping chains, as you can see in the picture above, because that’s the part that makes everything elvish and pretty :P), shorten or lengthen, add or remove, fix to your taste, wear it one last time to check your work and keep it on for a couple of hours to see if it’s too snug and uncomfortable, or if it’s too large and will slip down (thing I should have done but didn’t…), and feel very elvishly cool…

Blue charm in the middle, chrystal necklace dangling in a large U shape and yes, all the beaded chains I made myself, one by one, threading in eye needles bead by bead… this was the most time consuming thing of all :P
One last bit of information about this fancy headdress.
I made it for three main reasons: I really wanted to have something I made myself on my wedding, it would have been gorgeous with the dress, but most of all it completed the “something old, lent and blue”.
This thing, “Something old, something new, something lent, something blue” it’s not just a sappy rhyme, these four things have a symbolical meaning: the new, obviously enough, is because a wedding is a new part of life, blue is a good luck colour, while the old and the lent thing should come from a happily married couple, again to wish good luck.
The crystal necklace was a gift from my great aunt (the one who’s -middle- name I have, and the one I was never able to know) to my mom; while the blue (!) charm I borrowed from a friend, who, despite two kids and years of marriage, is still madly deeply in love with her husband.
